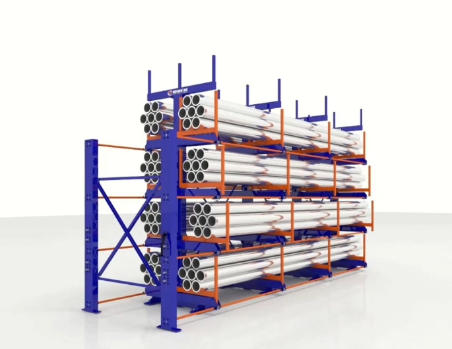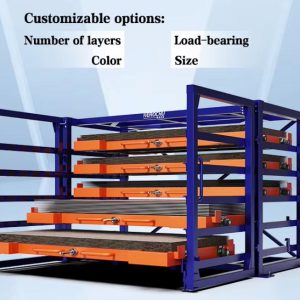
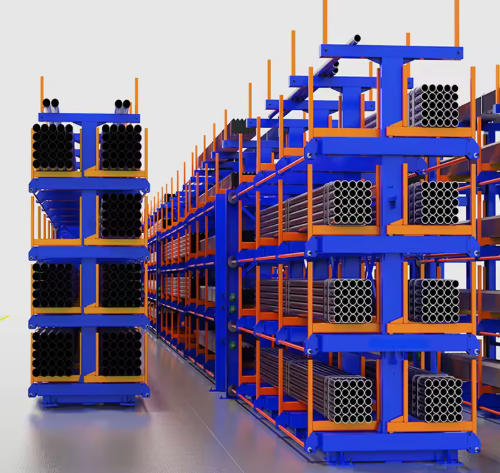
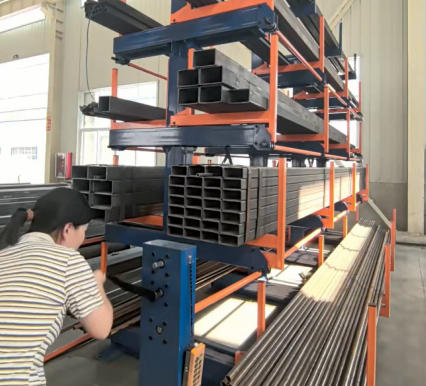
When it comes to optimizing industrial storage for long, bulky items like timber, pipes, or steel bars, Heavy-Duty Telescopic Cantilever Racking stands out for its exceptional density and accessibility. However, the significant benefits of this system—such as a single-layer load-bearing capacity of 3-8 tons and highly customizable configurations—are entirely dependent on a correct and secure installation. A flawed setup can compromise safety, stability, and functionality. This comprehensive guide details the professional installation process of heavy-duty telescopic cantilever tube racking, providing a clear, step-by-step methodology to ensure your storage system is built for maximum performance and durability.
Pre-Installation Planning and Safety
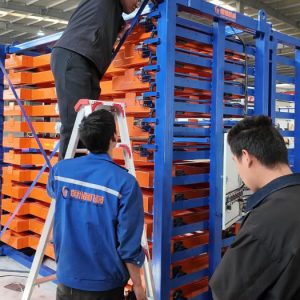
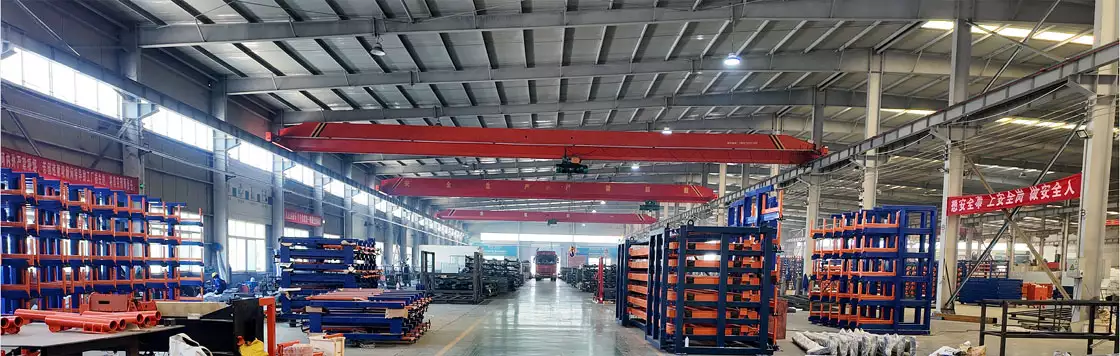
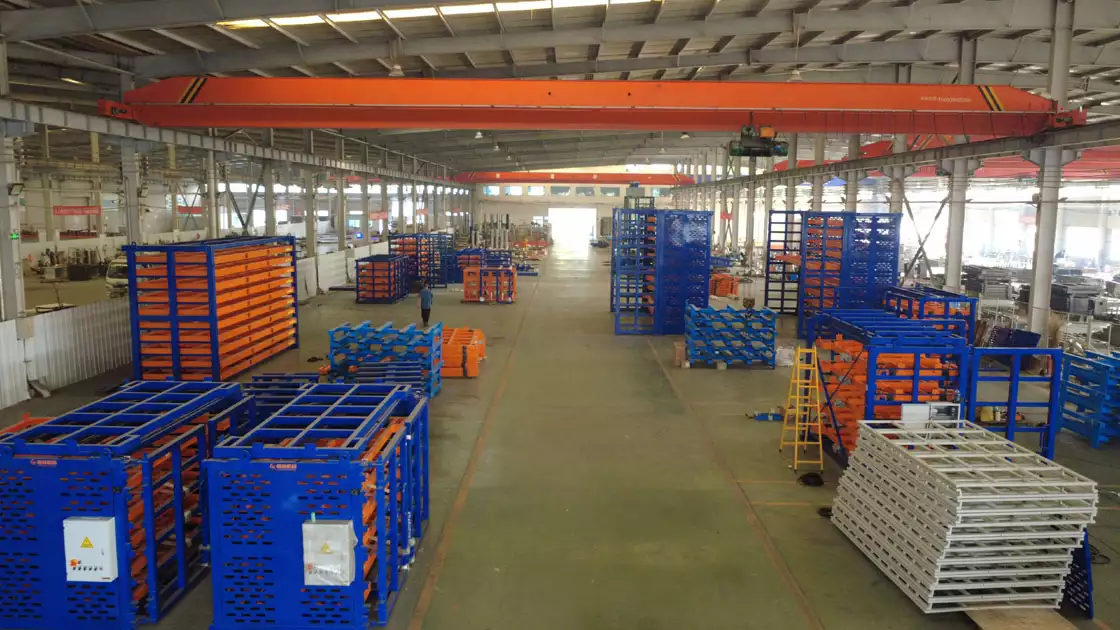
Before touching any component, thorough planning is essential. Confirm the warehouse layout, ensuring the floor is level and capable of supporting the fully loaded rack’s weight. Gather all necessary tools: spanners, wrenches, torque wrenches, a spirit level, measuring tape, and anchors suitable for your concrete floor. Crucially, wear appropriate personal protective equipment (PPE) including gloves, safety glasses, and steel-toe boots. Unpack all components—carbon steel uprights, telescopic tube arms, angle iron braces, and chain boxes—and verify them against the packing list.
Step 1: Assembling the Upright Columns and Primary Framework
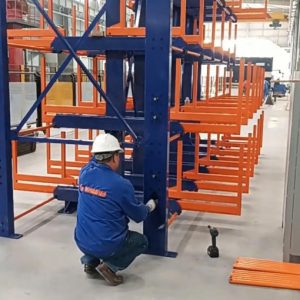
The foundation of the system lies in its upright columns. The professional installation procedure for heavy-duty telescopic cantilever tube racking systems begins by laying out the first set of uprights in their planned location. A critical initial step, often highlighted in manuals, is to first connect the square tubes at the top between these first uprights. This establishes initial alignment. Next, connect the angle iron cross braces to these uprights to create a stable “bay” frame. Proceed to erect the second set of upright columns at the prescribed spacing. Connect them to the first bay using longitudinal angle irons and the necessary diagonal braces. This sequence—erecting uprights, connecting top square tubes, and installing cross and diagonal bracing—continues until all upright columns are positioned. The key here is to keep all bolts and nuts finger-tight for now, allowing for final adjustments.
Step 2: Installing the Telescopic Tube Arms and Structural Supports
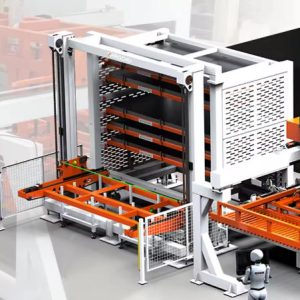
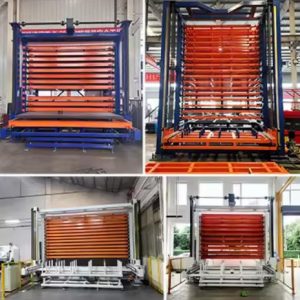
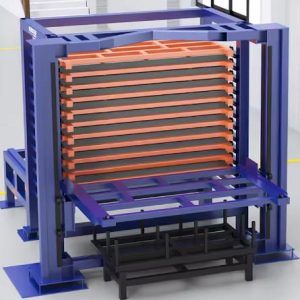
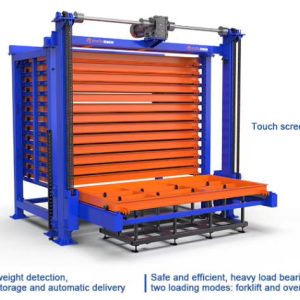
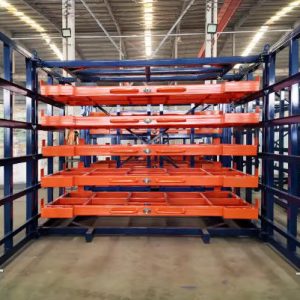
With the upright frame standing, the next phase involves installing heavy-duty cantilever racks: assembling uprights, arms, and bracing. This is the core of the cantilever rack assembly. Carefully install the welded round tubes (the fixed inner arms) onto the upright column brackets. Adjust the vertical spacing between arms according to your planned number of layers (4-12 layers, customizable). Insert the telescopic outer arms into the fixed tubes. At this stage, attach all screws and nuts but, as per instruction, do not tighten them permanently. This allows for the crucial alignment step to come. Following arm placement, erect the chain boxes. These are vital for synchronized extension. Connect the chain boxes to the upright columns as a unit using provided round tubes, then carefully link the two chains and connect them to the angle irons. This creates the mechanical system that allows multiple arms to extend and retract together.
Step 3: Alignment, Securing, and Anchoring
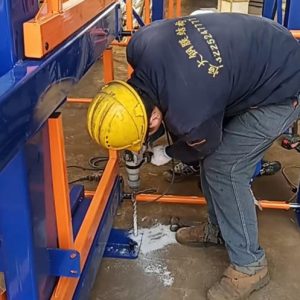
Once the entire structure is loosely assembled, the most critical precision work begins: alignment. Using a long spirit level and measuring tape, begin adjusting for horizontal and vertical alignment across the entire rack run. Check that uprights are perfectly plumb and that arms are level. This step directly impacts smooth operation and load distribution. After leveling, proceed to fasten all screws permanently using a torque wrench to the manufacturer’s specified settings. This secures all joints, braces, and arm connections. Now, move to floor fixing. Begin fixing the anchor bolts into pre-drilled holes in the concrete. Tighten the anchors securely to prevent any potential tipping or movement, especially when the rack is under asymmetric load.
Step 4: Final Debugging, Testing, and Best Practices
The professional installation process for industrial cantilever storage racks is not complete without rigorous testing. Conduct a final debugging: manually crank (for manual systems) or use the button (for electric systems) to extend and retract each layer. Ensure movement is smooth, chains are properly tensioned, and no components bind. Finally, conduct a loading test. Start with a partial load, gradually increasing to the maximum intended capacity for each arm. Observe for any deflection, noise, or movement in the structure. This verifies the installation’s integrity. Remember, the system’s mode of movement (single-side or double-side assisted) should operate effortlessly. The bottom floor height from the ground (typically 330mm) should provide clear access for handling equipment.
Conclusion
A meticulous installation transforms high-quality components into a reliable, high-density storage solution. By following this step-by-step installation guide for heavy duty cantilever tube storage racks, you ensure the system achieves its goal of improving space utilization by 2-3 times over traditional racks, while enabling simple, safe operation perfect for integration with forklifts and cranes. Proper installation is the definitive first step toward achieving a streamlined, efficient, and safe material handling workflow.