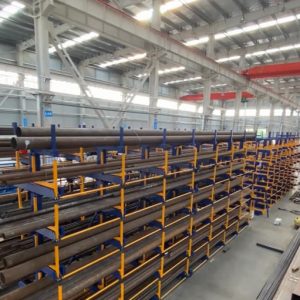
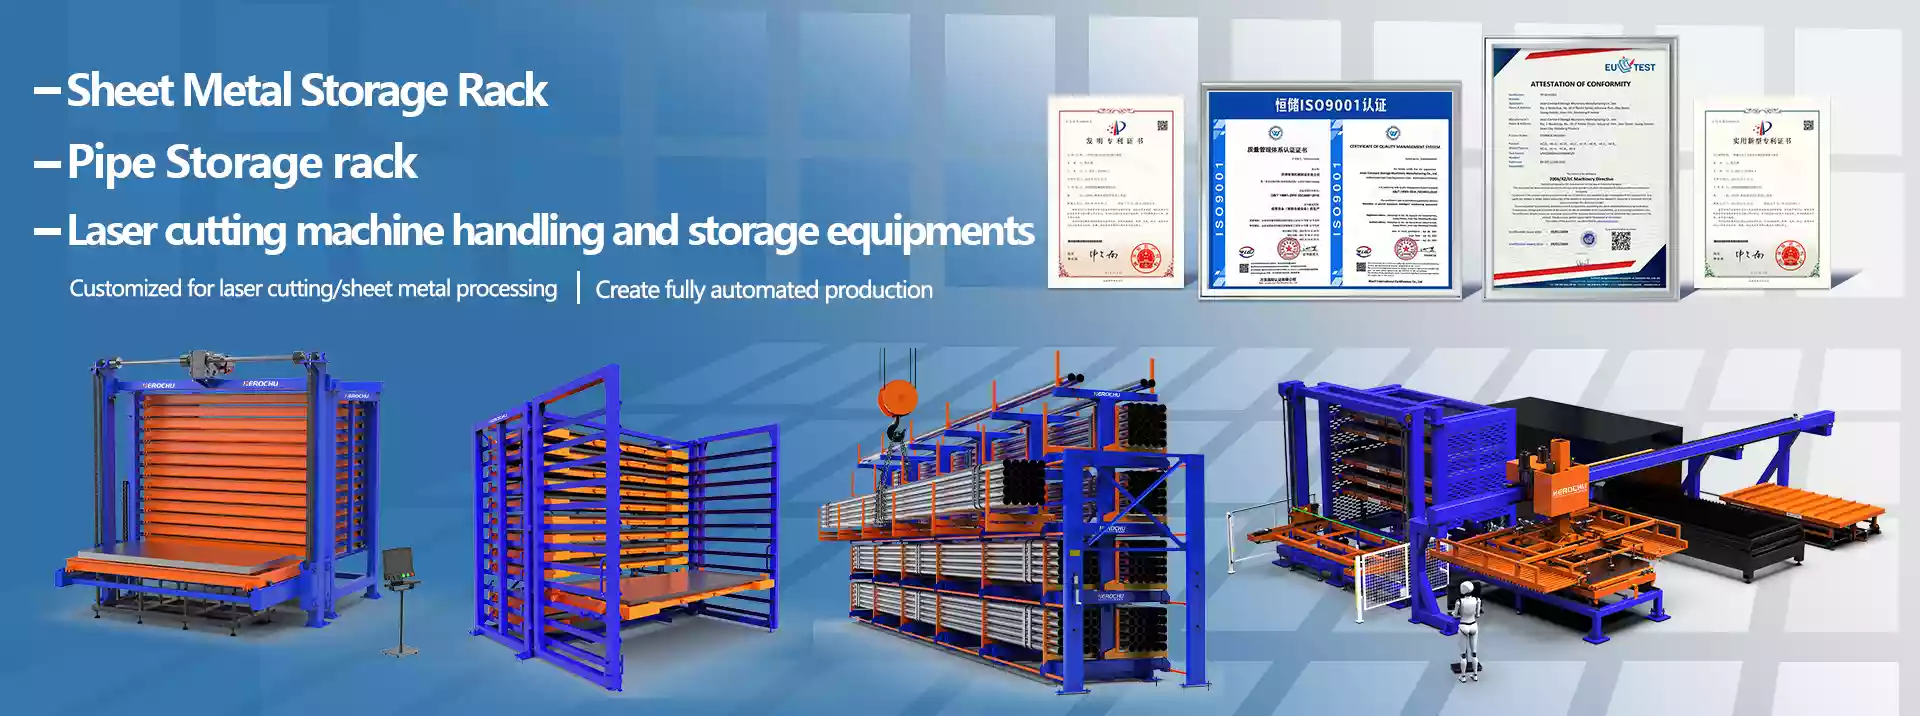
In today’s fast-paced industrial and warehouse environments, efficient storage solutions are essential for reducing costs, improving productivity, and ensuring workplace safety. Roll out pipe storage racks have emerged as a top choice for storing long, heavy materials, thanks to their unique combination of space-saving design and easy accessibility. These racks extend during loading and unloading to provide direct access to materials and retract when idle, eliminating the need for costly forklift turning paths and increasing storage density by 2-3 times compared to traditional racks. However, to fully leverage these benefits, proper installation is crucial. This complete guide walks you through every step of installing roll out pipe storage racks, from preparation to testing, while highlighting how to maximize space utilization and maintain safety throughout the process.
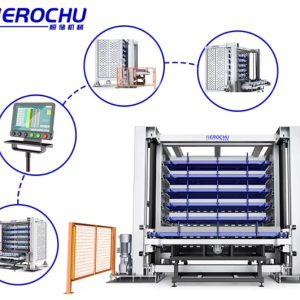
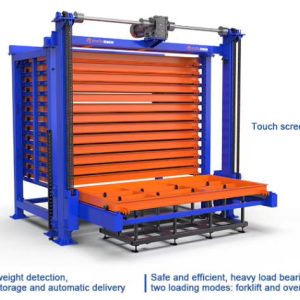
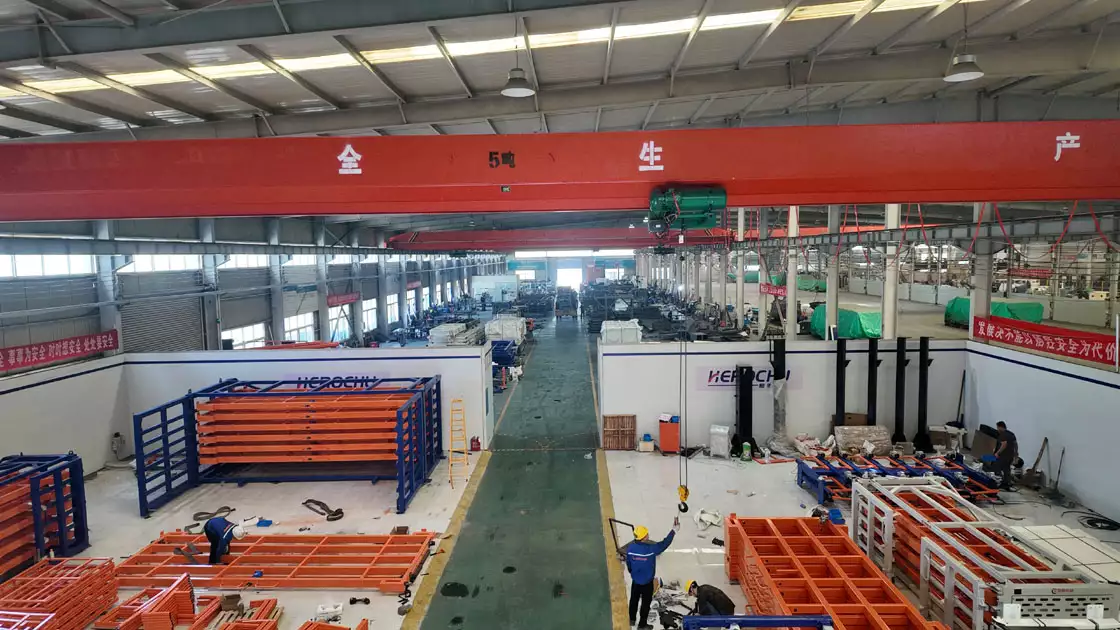
Before starting the installation, it’s important to understand the key features of roll out pipe storage racks that influence the assembly process. This model is constructed from high-quality carbon steel, which offers exceptional strength and durability for heavy-duty applications, with a single-layer load capacity of 3-8 tons. It is customizable with 4-12 layers, allowing you to adapt the rack to your specific storage needs, and the bottom floor height from the ground is 330 mm, providing ample clearance for forklifts and other material handling equipment. The rack is available in white, blue, and other customizable colors, making it easy to integrate with your warehouse’s inventory management system (e.g., color-coding for different pipe types). Additionally, it offers both single-side and double-side assisted movement, with hand-cranked (effort-saving) and electric (one-button start) options to suit different operational needs.
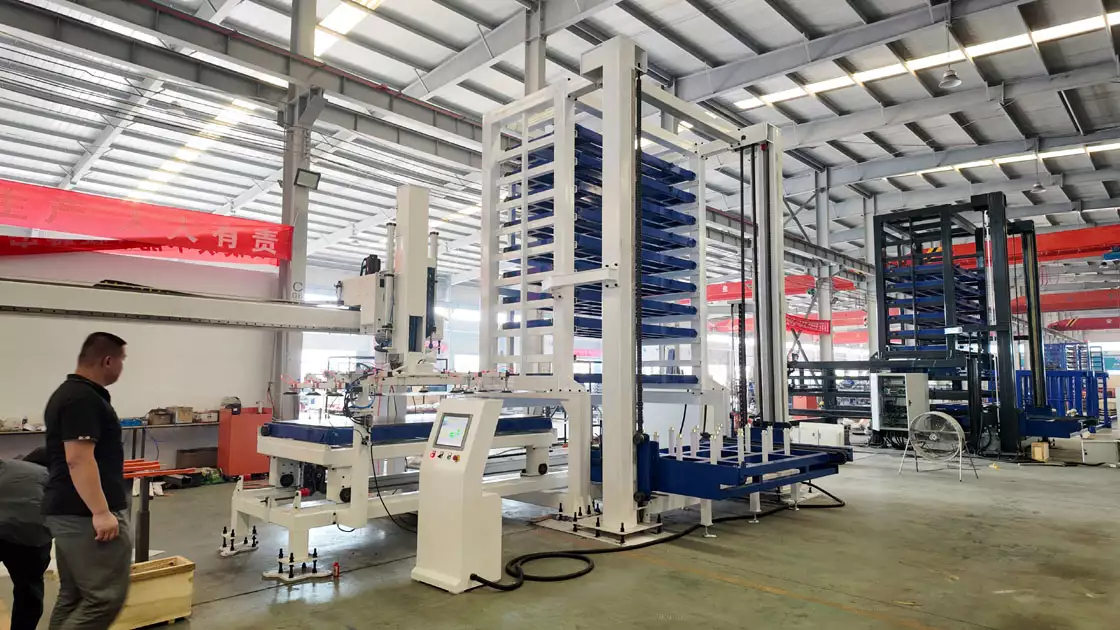
The first step in installing roll out pipe storage racks is preparation, which involves site setup, component inspection, and tool gathering. Start by preparing the installation site: clear the area of debris, obstacles, and any unnecessary equipment to create a safe working space. Ensure the floor is level and clean—use a level to check for unevenness, and use shims to correct any minor slopes. The floor must be able to support the total weight of the rack and its maximum load, so if you’re unsure about the floor’s load-bearing capacity, consult a structural engineer. Next, inspect all components to ensure they are present and undamaged. This includes upright columns, square tubes, angle iron cross braces, diagonal braces, welded round tubes, chain boxes, screws, nuts, and anchor bolts. Damaged components should be replaced immediately to avoid compromising the rack’s structural integrity. Finally, gather all necessary tools, including a laser level, spirit level, torque wrench, wrench set, screwdriver, drill, and hammer.
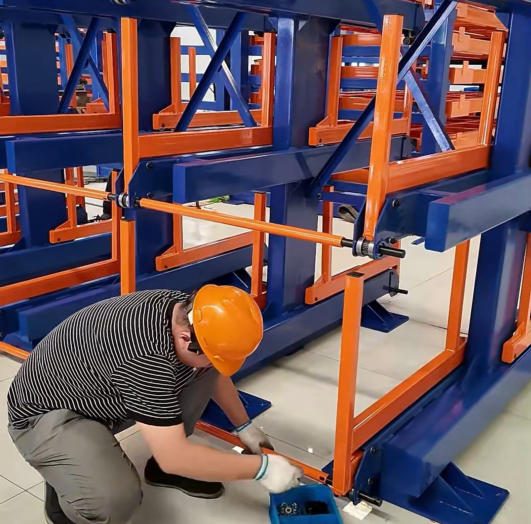
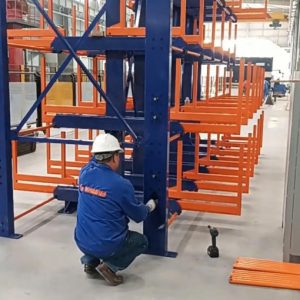
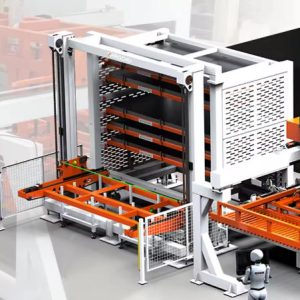
The installation process begins with assembling the upright column framework, which is the foundation of the rack. Start by connecting the square tubes to the top of the upright columns—this pre-assembly step helps maintain alignment when erecting the columns. Take the first set of upright columns and position them at the front of the installation site, using a laser level to ensure they are perfectly vertical. Once in place, attach the angle iron cross braces to the lower and middle sections of the columns using screws and nuts. Do not fully tighten the fasteners at this stage; leaving them slightly loose allows for adjustments later. Next, erect the second set of upright columns parallel to the first, maintaining the correct span, and connect them to the first set with angle iron cross braces. Install diagonal braces between the columns to add lateral stability—this is especially important for preventing the rack from swaying when loaded with heavy pipes.
Continue erecting additional sets of upright columns, connecting them to the existing framework with cross braces and diagonal braces, until all columns are in place. After each set is installed, check the alignment of the framework to ensure it is square and plumb. To check for squareness, measure the diagonals of the framework—if both diagonals are equal, the framework is square. If not, adjust the position of the columns until squareness is achieved. This step is critical, as a misaligned framework can cause the roll-out mechanism to malfunction and reduce the rack’s load-bearing capacity.

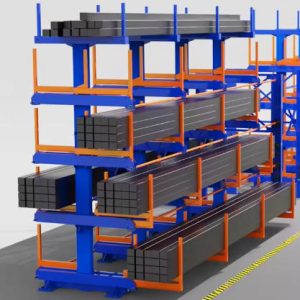
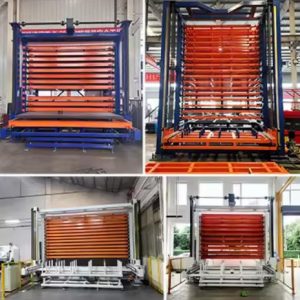
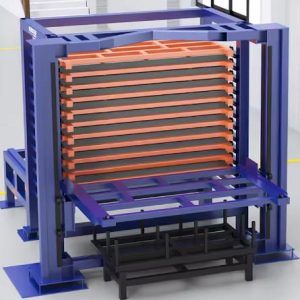
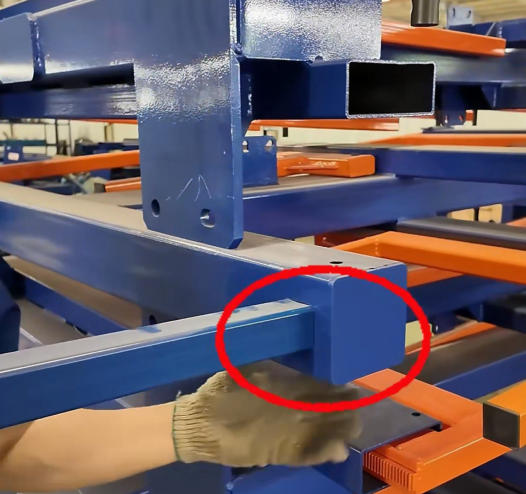
With the upright framework complete, move on to installing the welded round tubes (cantilever arms). These arms are the primary components that hold the pipes, so proper installation is key to ensuring they can support the required weight. Insert the round tubes into the designated slots on the upright columns, adjusting the spacing between them to fit the size of the pipes you’ll be storing. For example, if you’re storing large-diameter steel pipes, you’ll need wider spacing to distribute the weight evenly, while smaller pipes can be spaced closer together. Once the spacing is set, attach the round tubes using screws and nuts, but again, do not fully tighten them.
Next, install the chain boxes, which enable the roll-out functionality of the rack. The chain boxes are mounted on the upright columns and connected to the cantilever arms via chains. Start by positioning the chain boxes on the side of the columns (single-side or double-side, depending on your needs) and securing them with round tubes. Ensure the chain boxes are level and aligned with the cantilever arms—misalignment here will cause the chains to bind or wear out quickly. Connect the chains from the chain boxes to the cantilever arms, then attach the angle irons between the chains to maintain tension. Test the movement of the cantilever arms by extending and retracting them—they should move smoothly with minimal effort. If there is any resistance, check the alignment of the chain boxes and adjust as needed.
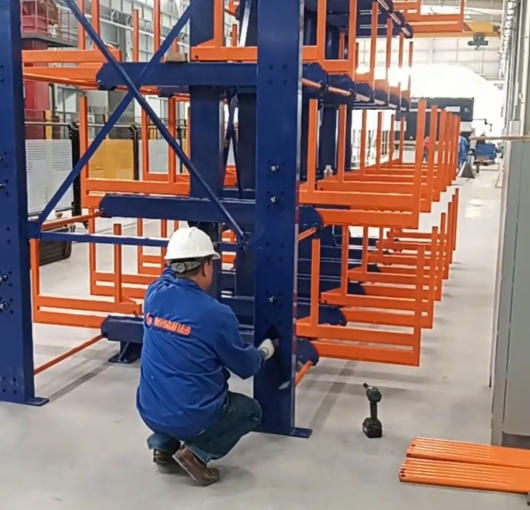
Once all components are installed, it’s time to align the rack and tighten all fasteners. Use a laser level to check the horizontal alignment of the cantilever arms and top bracing—all surfaces must be level to ensure even weight distribution. For vertical alignment, use a spirit level to confirm that each upright column is plumb. Make adjustments by loosening the screws on the cross braces and cantilever arms, repositioning the components, and retightening the screws. Once the rack is properly aligned, use a torque wrench to tighten all screws and nuts to the manufacturer’s recommended torque settings. This ensures that all components are securely fastened and prevents loosening over time due to vibration.
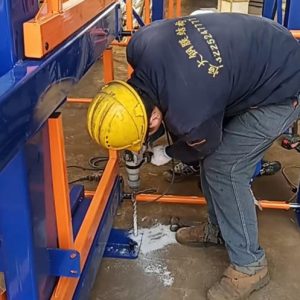
Securing the rack to the floor with anchor bolts is a critical safety step that should not be overlooked. Anchor bolts prevent the rack from tipping or shifting when heavy loads are added or removed, especially when using forklifts to load materials. Mark the positions of the anchor bolt holes on the floor using the base of the upright columns as a guide. Drill the holes to the appropriate depth, insert the anchor bolts, and tighten them using a wrench. Ensure the anchor bolts are fully seated and secure before proceeding.
The final step in the installation process is debugging and loading testing. Start by conducting a visual inspection of the entire rack, checking for loose components, misalignments, or damage. Test the roll-out functionality of each cantilever arm, ensuring they extend and retract smoothly. Next, perform a load test by gradually adding weight to each layer, up to the maximum single-layer load capacity of 3-8 tons. Monitor the rack for any signs of bending, cracking, or shifting during the test. If any issues are detected, stop the test immediately, identify the problem, and make the necessary adjustments. Once the rack passes the load test, it is ready for regular use.
To maximize space utilization with your roll out pipe storage rack, consider the following tips: Customize the number of layers (4-12) based on the height of your warehouse and the volume of materials you need to store. Adjust the spacing of the cantilever arms to fit the specific dimensions of your pipes, eliminating wasted space. Use the rack’s roll-out functionality to access materials without moving other loads, reducing the need for extra storage space. Additionally, take advantage of the rack’s color customization to implement a color-coding system for different pipe types, making inventory management more efficient and reducing the time spent searching for materials.
Safety is another key priority when installing and using roll out pipe storage racks. Always follow the manufacturer’s load capacity guidelines—never overload a layer, as this can cause the rack to fail. Use proper material handling equipment (such as forklifts or cranes) when loading and unloading heavy pipes, and ensure workers are trained in the safe operation of the equipment and the rack. Regularly inspect the rack for signs of wear, such as loose fasteners, worn chains, or rust, and perform maintenance as needed. By prioritizing safety during installation and use, you can create a safer working environment for your team and protect your investment in the rack.
Installing roll out pipe storage racks is a straightforward process when following a structured approach, and the benefits are significant: improved space utilization, streamlined inventory management, and enhanced workplace safety. By following the steps outlined in this guide, you can ensure that your rack is installed correctly, operates efficiently, and provides reliable storage for years to come. Whether you’re a small warehouse or a large industrial facility, roll out pipe storage racks are a versatile solution that can help you optimize your storage space and improve your operational efficiency.